
Redirects are essential in maintaining a seamless browsing experience for your website visitors, especially when you’ve updated page URLs or restructured your website. As a marketing agency, we often guide clients through this process, and in this article, we’ll walk you through setting up a 301 redirect on Squarespace in an easy, step-by-step process.
What Is a 301 Redirect?
A 301 redirect tells search engines and browsers that a page has permanently moved to a new URL. It helps maintain the old page’s SEO equity (ranking, backlinks, etc.) and ensures users don’t land on an error page.
Why 301 Redirects Are Important
Redirects are more than just a convenience for your visitors. When implemented correctly, 301 redirects:
- Preserve your search engine rankings by transferring the SEO value from old to new pages.
- Prevent 404 errors, which can frustrate users and cause them to leave your site.
- Help search engines understand the new structure of your site and continue indexing the correct pages.
So, what’s the best way to create these crucial links on your Squarespace site?
How To Set Up a 301 Redirect in Squarespace
Setting up a 301 redirect in Squarespace is a straightforward process. Here’s how you can do it in just a few simple steps:
Step 1: Log Into Your Squarespace Account
To get started, log into your Squarespace account and navigate to the website you’re managing. Once inside the site’s dashboard, you can access the necessary tools to create redirects.
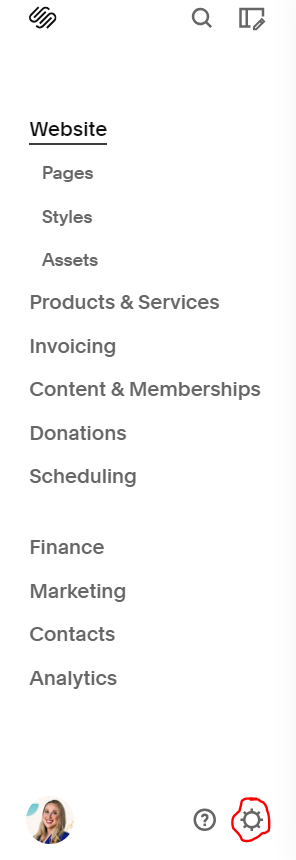
Step 2: Go to the URL Mappings Section
Once in your dashboard, click on Settings in the left-hand menu. Under the “Website” settings, find and select Developer Tools. You’ll see an option for URL Mappings. This is where you will input your 301 redirects.
There are many different options, and finding exactly where you need to go can be difficult. As an example, the settings option is represented at the bottom of the page here:
Step 3: Set Up the Redirect
You will need to enter the old and new URLs in the URL Mappings section. The format for entering a 301 redirect in Squarespace is as follows:
/old-url -> /new-url 301
Here’s an example:
/about-us -> /about 301
This tells Squarespace that anyone trying to visit /about-us should be automatically redirected to /about, and it’s a permanent (301) redirect.
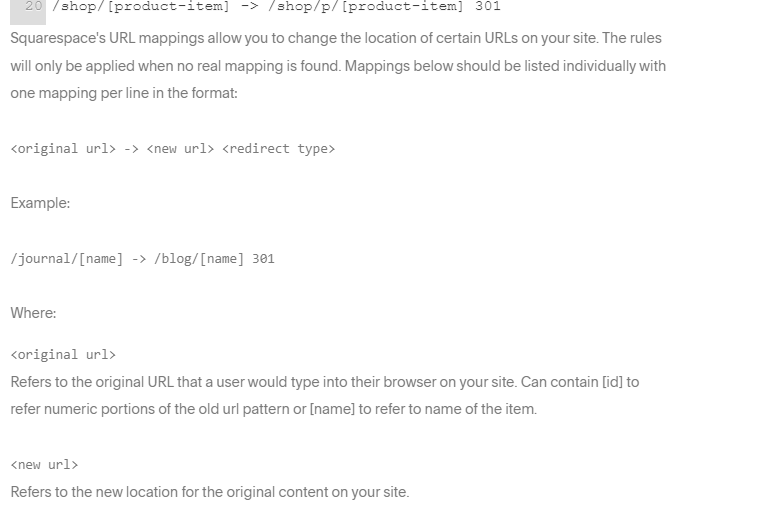
Another example can be found above. You provide the /Shop page URL you’re looking to redirect, followed by -> symbol, and then the new URL, followed by typing 301.
Step 4: Save the Changes
Once you’ve entered the necessary redirect mappings, simply save your changes. Squarespace will now automatically handle the redirection for you.
It should be noted that if you’re redirecting a page that still exists, you will need to hide it. The Redirect will not work until you remove the page as a public option. You can do this by finding the page view on your dashboard, selecting the options section, and then toggling the Enable Page option off.
Redirecting Multiple Pages
If you’re restructuring multiple pages or moving an entire section of your website, you can redirect multiple URLs at once. Just ensure each redirect is on its own line following the same format. For example:
/services/old-service -> /services/new-service 301
/contact-old -> /contact 301
This way, you can efficiently manage and streamline the process of redirecting multiple pages on your site.
How To Test Your Redirects
After setting up your 301 redirects, it’s important to test them to ensure they’re working correctly. Simply open a new browser tab and try navigating to the old URLs. If everything is set up properly, you should instantly be redirected to the new URLs. You can also use online tools such as redirect checkers to verify that the 301 redirect functions as expected.
Common Issues with 301 Redirects
Sometimes, even with the correct setup, you may need help with 301 redirects. Here are some common problems and quick fixes:
- Trailing slashes: Make sure you’re consistent with trailing slashes in your URLs (i.e., /old-url/ vs. /old-url).
- Typos in URL Mappings: Double-check that you’ve entered the correct paths for both the old and new URLs.
- Not Saving Changes: Ensure you save the changes after adding your URL mappings.
If you’re still experiencing issues, clearing your browser’s cache and retrying the redirects might be helpful.
Work With a Marketing Partner
Setting up 301 redirects in Squarespace is a simple but crucial step in maintaining the integrity of your website. By following the steps outlined above, you can ensure that both users and search engines are properly directed to the new pages on your site. Need help managing your Squarespace site or want to improve your website’s SEO? Contact Perfect Afternoon today.
